Thursday, October 31, 2013

Week 5 - Tween Boy Bedroom Updates - DECOR & Furniture galore!

Like everyone in this ORC Challenge, problems do arise.

 For us it was with the room arrangement.

We originally had the bed on the back wall like this...
BEFORE
ORIGINAL ROOM LAY OUT

I originally wanted this lay out....
REVISED LAY OUT
But when we painted, and placed the bed on the same spot...

Uh-oh?! I didn't like the way it's looking
I didn't like how it looked because I realized the huge foot board 
of the bed got in the way of 'seeing' the actual bed!

And of course, since the bed is usually the focal point in any room, I wanted it to be seen. Plus, originally, I wanted the bookshelves on both side of the bed, however, lighting was an issue. I wanted to use the lamps that were originally in the room  so having the bookshelves on both side plus side tables didn't seem to look good to me.

So this bed made a move , can you guess where? I'll show it in the reveal.

Second problem - I THOUGHT WE HAD 2 MORE WEEKS BEFORE ORC REVEAL!!!!!!!! AAAAAAHHH!

And since I was gearing up for one more post before next week, your gonna be in for a longer post this week. So let's start.
Fist off,  I got busy upgrading some furniture!
Remember this?

My $5 Marshall Fields Mid-Century Dresser 
It did this upgrade....

Yup, it's gone navy too

Love the grooves on the drawer

But too plain, so added this gold


Since I'm a 'lazy' DIY-er, I spray painted this whole thing using 2 cans of Valspar Spray paint !
Love this spray paint and would recommend it if you plan to spray paint furniture since it DOESN'T DRIP! Really easy to use and I painted the gold using Martha Stewart Antique gold paint and brushes.

And here it is now...


We used the same gold bar handles we used for our kitchen, added a couple of coats of polyurethane and viola! Come to think of it, one handle (which cost $9.40) cost more than the whole dresser itself! :-)

I also HACKED THE LACK!


BEFORE

AFTER
I used 2 old IKEA LACK tables, one black and one brown, had hubs screw the top of one to the bottom of the other and then sparyed the same VALSPAR spray paint + multiple coats of polyurethane! Plan to add castors later on for easy moving. :-)

I think this Parson look-a-like is pretty awesome & easy!

Next, I've been doing a lot of shopping...

Very Practical TARGET option 

Pillows on clearance

Got lucky Globe shopping at the Thrift - $3 a piece
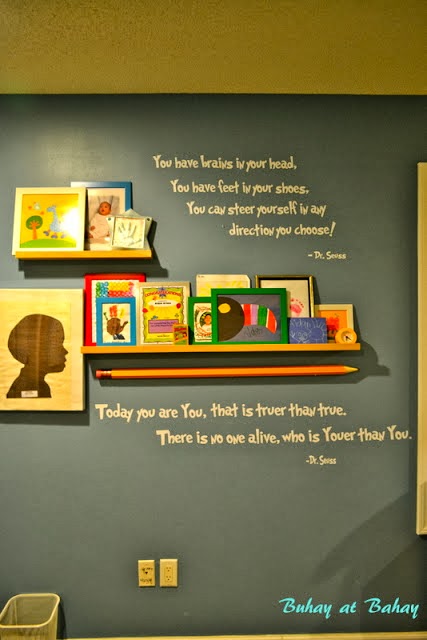
.. and Decorating!

Book Ledges
Study area

TV area

I hope you guys check out the reveal next week since I think looking back at all the progress made in everyone's space, this is gonna be one of the best ORC Yet!

Hooray! Now, go out and have some fun this Halloween after your check on the others progress!!


HAPPY HALLOWEEN!

Linking back to...

Calling it home


If you want  to see the evolution of this space click on the LINKS BELOW...


Also Linking back to these other Fabulous Parties...


This project was also featured at...

Featured At Serenity Now

Wednesday, October 30, 2013

Halloween Birthday Dinner Table


We had a very small and simple dinner with some friends a few weeks back to celebrate my Hubs birthday and I just wanted to share with you his Halloween Birthday set-up...


A dose of Golden goodness was set


Started with Vietnamese Phoa

Got the Flatware from an antique store, always wanted to have gold and I'm lucky to find these at a great price!
The Gold rimmed plate and bowl is from Walmart years ago

Added this small frames from TARGET clearance (50 cents each) and hand wrote our names

Also brought out some of my brass candle sticks and used my Brass urn for the champagne!
The kids had their own table as usual and for our main course we had Stir-fried Bokchoy in Oyster sauce, Chicken with Celery & Steamed Red Snapper. I made Sansrival for dessert.

Overall, my husband seemed happy, a small token of my love and appreciation for all the HE IS to me and our family!


Hoping you have a Fun-filled Halloween Tomorrow!

Monday, October 28, 2013

My Easy Halloween Decorations around the House & Birthday Shout-out!


It's Halloween week and since I'm not sure you all saw my guest post over at LIVING SAVVY , let me share  this with you!

WARNING: I do go crazy decorating during Halloween, but most of this 'craziness' is mainly in our Dining Room, the  rest of the house has only 'subtle' touches here and there. :-)

Here is our Living Room...


Simple pillow switch does the trick
Coffee table
As you can see I  just added a web-inspired black runner underneath my usual coffee table vignette. Switched ups some of my usual brass with this huge ceramic pumpkin and acorn (scored from TJ Maxx years ago), and added my Alexander McQueen Coffee table book and I'm set!

Media Center
The key to decorating for Halloween I think is removing all that is cheery and bright and switching them up with your usual Halloween stuff or at least "Halloween colors". 
Here, I removed most of the family photos, added pumpkins and small ghost candle holders from Walmart and switched up the art to something more dark, and it's set!

Console table
For this area, just placed my black and white Missoni for Target vases, added some glitter skulls & Penguin books, and done!

Scored this guys from last year and the Penguin books are from my collection - just brought out "Dracula" and "Dorian Gray" - perfect for Halloween!
Hallway

These spiders were from Target last year, left-over from my son's Halloween birthday party, thought they looked cool hugging the posts. :-)

Piano
Here I just added the runner, made a lighting switcheroo  by moving my usual floor lamp to the entry and placed my Goodwill Threshold Lamp score. I think the black shade is perfect! I  added some crows  to my grape wood and  my black accessories, and VIOLA! Halloween-ready! Take note of that small rubber snake I added to my boxwood and the rat cut-outs on the stairs.


Here's another glimpse of my 'craziness' for Halloween...

Witches Dining Room

Remember, you don't have to be ALL OUT to enjoy this fun Holiday, little doses of Halloween goodness can go a long way. Just make sure to keep an open mind, and have LOTS OF CANDY!

Hoping for a  Fun and Safe Halloween for you and your family!


Also, I would like to greet my son a very Happy Birthday!!!!!!


Thursday, October 24, 2013

Week 4 - Tween Boy Bedroom Update & Bench building and Furniture updates

We have been busy bees working on our son's room for the ORC!
I bet by now, all of you are pretty familiar with this awesome link party hosted by Linda from "Calling It Home".

We have been mostly doing a lot of  building and painting!

First, we got into building the bench for the Reading nook dormer...

Yup, we used Laundry cabinets!
We used laundry cabinets for the front since it was the perfect height for this space and it already came with 2 rows of shelves on the inside for books!

Building it in
 My handy-man a.k.a husband, worked his 'magic' and made it to look like this.

This is what it looks like from the top without the seat and how he attached it the walls.
It's pretty sturdy and he only used  one each of the 2' x 6' and 4"x 4" wood.
The Laundry cabinet cost us $89.99 + wood  put us about $110.
And here it is now with the foam seat we added!

Can't believe we built this thing!
We basically used a 3 inch foam, spray-glued batting and stapled this beautiful Navy & White striped Robert Allen Fabric onto the wooden seat! The wooden seat is made up of solid pine and very thick so no worries about staples cutting our boy's booty!

The best part was that all our materials for the foam seat were all 50% off at Joann's! So over all, this built-in bench cost us $178!!!!

I am also updating this...

Mid-century style dresser
It's a Salvation Army dresser I scored years ago for $5. It's in great shape except for a lot of deep scratches on the side and it was from "Marshall Fields" furniture line. For those not familiar with MF, it was a Chicago Store, bought out by Macy's in 2006(I think).

The dresser once 'lived' in my younger son's bedroom but he got a new white IKEA Malm dresser, so I thought it would make a great DIY furniture update project for me.


I am also hacking the IKEA Lack for one of the side tables...

Parsons-like LACK table from IKEA
I'll show you what it both  looks like next week and also the some of the other decorative updates I did for the space!


If you want to see the other posts about this space, click HERE,   HERE & HERE.
Now, let's go check on the others' progress!

Linking back to...

CHECK THE PARTY OUT HERE

Tuesday, October 22, 2013

ETSY Loves

Are you addicted to ETSY  yet?

Well I am. And I would like to share some purchases I made recently


First of, are these lovely white pumpkins from

Prettiest fabric pumpkins I've seen lately

Embelished with vintage rhinestone brooches and real, dried Pumpkin Stems!
They will be perfect centerpieces too for a Fall wedding don't you think?
The owner of the shop, Catherine, also has her own blog of the same name where she shares how she comes up with these amazing crafts and decor

The other thing I recently got was a decal for my Coffee Machine!

Sorry for my unsteady hands!
I got these from Ink Blot Design Studio, and I have gotten a lot of other decals all over ETSY over the years...
Dr. Seuss quotes from Casa Bella Vinyl

Dr. Seuss Galore from Dallas Divah
My purchases came relatively fast and the sellers are all pleasant. There are  so many other Decal sellers on ETSY, so truly, it's a 'buyers market' for this kind of decor!

Lastly, I got these...

Green Malachite Pagoda 1 from The Pink Pagoda
Green Malachite Pagoda 2
I have always been enamored by Malachite and since I can't get a hold of the real ones yet, these gorgeous prints from The Pink Pagoda was just the perfect fix!

I haven't hung them yet since I'm still searching for the right frame. They look so much more pretty in person and I am indeed very pleased with this purchase. The Pink Pagoda also has other chinoiserie-inspired prints available so if your on a hunt for something similar, this is your store!

Did I also mention that Jennifer also runs a fantastic blog of the same name?! Check it out when you have the time, lot's of inspiration for sure. 

So, if your not yet 'addicted' to ETSY, BEWARE, you can be like me too once you start checking it out!


Have a Great day!

DISCLAIMER: All opinions about these products are mine. I did not receive any compensation for my reviews nor do I expect these sellers to compensate me for my mention of their shops here.