Hello Friends!!!!!
Thank you so much for stopping by! And if you just headed over from
Laura over at DECOR TO ADORE and swooned already at her beautiful Spring home, I hope that I don't disappoint!
There's a lot of things to be said on this post actually. First, let me thank
Marty from A STROLL THRU LIFE, for her unbelievable patience and dedication to us all participating in the Spring Home tour. She is the glue that holds this whole tour together (and many more in the past and future), I truly am grateful and I love you for your passion for everything you do, it truly shows in your home and blogging.
Second, to my long-time friends and readers, I truly apologize for my absence in blogging. As you can see from the post before this, my last post was way back in December. Yup, December. Those who follow me on
IG know that everything is fine in my life. There are things personal that
I cannot divulge to you since though it is close to my heart, it's not about me (involves me though).
Other than that, I'm on the verge of launching an ONLINE STORE!!!!! Yup, a store, I have to keep it a surprise until the launch because of fear of people copying my invention (yes, I'm sort of an inventor now too). It's not life-changing or life-saving, it's a simple idea that has bugged me since last summer, and yes, it has something to do with my obsession with organizing my home and my other passion, bags!My new baby is called "LUXURY BAG DISPLAY", and I'm sure from the name you bloggers can deduce what it's gonna be about. I will definitely let you know more as the days go on, so please bear with me.
But back to the reason why your all here, my Spring Home tour! I'm making up a little for my prolonged absence with a long tour here! Let's start with the LIVING ROOM...
 |
| Welcome! |
 |
| I did blue and green in my living room to go with my Chinoiserie collection |
 |
I put my shell planter indoor during winters and I think it's perfect with these new plants on our
coffee table. |
 |
| Green Galore here! |
 |
| I used my velvet green pillows which normally just comes out during Christmas, for my sofa |
 |
| Above the piano, the greens continue with my bunnies |
 |
| I love my console showing off my blue and white collection and adding the bunnies and greens just made sense |
 |
| I love peonies! |
 |
| I also moved my Homegoods find, this William-Stafford Ginger jar print over here which I think is perfect too! |
 |
This beautiful piece of Ribbon art is the reason for my wall art move - it's a custom art work from
ANGELA CHRUSCIAKI-BLEHM! She is an artist and blogger and one of the participants in last year's
One Room Challenge! |
Now let's go to the DINING ROOM. This year, is probably the subtle-st I've had this room yet. I normally go bonkers in this room, but this time, I wanted to go simple...
 |
| Peonies galore again. The Vase was a gift from my co-worker last Christmas |
 |
My Faux Chocolate Bunnies are back and I'm finally able to use my lettuce ware!
Their from AVON, not Dodie Thayer or Tory Burch, but I think they look just as cute. |
 |
| I layered the lettuce plate with Jusi Napkins from the Philippines (a gift I got ), my Fireking white milkglass with gold trimmed plates, and my Carlson canning plates from Front gate. The beautiful marble place mat is from Vivid Hue Home. |
 |
| Did you notice the Amber glass? I bought this from an antique store since it reminded me of my Great-grandmother's own set! The copper flatware is from Hampton Forge and the silver three-tiered tray is a gift from one of my friends. |
 |
| My Runner is a post-Valentine Clearance find from TARGET |
Now, let's head on to the KITCHEN...
 |
| The Blue and white continues |
 |
| I really love my DIY cherry blossoms here, it's held up pretty good since I made it a couple of years ago |
 |
| Bunny Jars scored last year after Easter from Target |
 |
| I have all my potted plants by the sink |
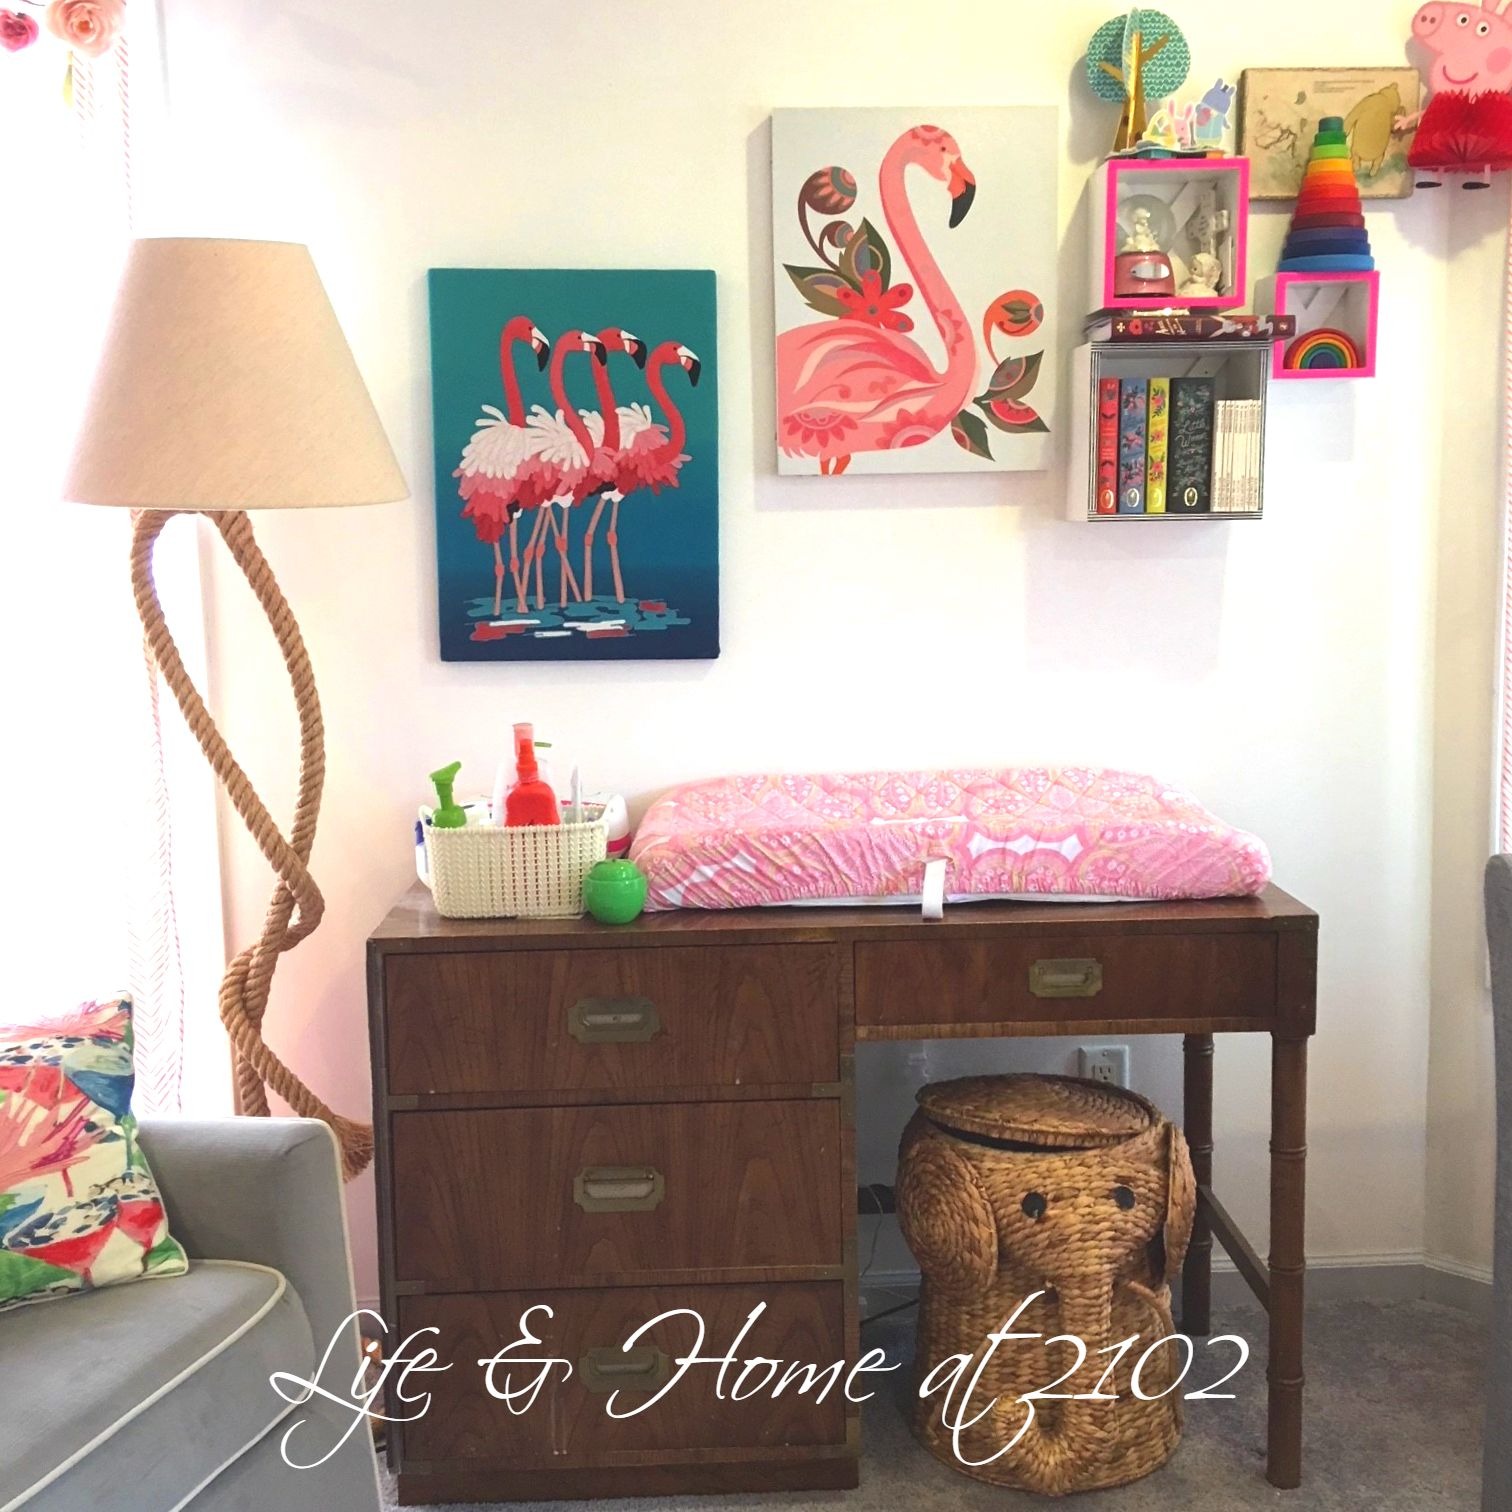
Tired yet? Hopefully not, we're headed upstairs to my daughter's room...
 |
| A cute Easter craft I made with my 3 year old to decorate her room |
 |
| Love how I can go crazy with Pastels here! |
 |
| The bed cover is a table cloth from Target I bought years ago, my MIL sewed the pillowcases from it too! |
 |
| Do you see where we added our Easter Craft decor at? |
 |
| Here's the other one |
And lastly, the final room, our Master Bedroom...
 |
| I used my velvet green bedding and changed out the curtains too. |
 |
| Made the room have a forest-y feel to it |
 |
| Layers of pillow which I love |
 |
Did some re-arranging on the dresser top. Received my Royal Roses last V day from hubs, it's supposed to last 1 year, so
far, so good. I also moved my small altar here (I'm Catholic). |
There you have it folks! I hope you head on over to
Jennifer of DECORATING DELIRIUM next! Her style and home is always filled with tons of inspiration for spring and beyond!
Thank you again for taking the time to visit our home and also for understanding my situation. What can I say, LIFE HAPPENS, and OPPORTUNITY KNOCKS, I'm so blessed to have a very supportive husband in all this. And of course, I still have my day job as a mom, wife and Pediatrician you know!
Have a Wonderful Day!
2018 Spring Home Tour
Monday – March 19
Tuesday – March 20
Wednesday – March 21
Thursday – March 22
Fri –March 23
VEL
Would love to hear your thoughts! Please share away...
Also joining...
Anything Blue Friday