Wednesday, May 29, 2013

Displaying my Penny Souvenirs

Do you collect these?


source

Obviously I do...


Ever since we came to the U.S. 
whenever we go somewhere that has the machine that makes these, I'm there.

Aside from the sentimentality, I love that these souvenirs are relatively inexpensive,
easy to lug around and my kids just love turning the wheel and seeing their prize!

I didn't want to keep them in a bottle forever since what is the point of a souvenir if you can't appreciate (or see ) them right?

I thought it best to display them like this...


Penny Wall art

Closer look...


I got the frame on clearance from TARGET. This is what is originally looked like...

$7.73
I was gonna get a Shadow box, but for the size and price, this wall art was way better. 
I removed the backing and added contact paper.

Added my TJ Maxx Laura Ashley Contact paper
I chose contact paper because it's easy to cut (lines on the back) and the pattern in front made 
it easy for me to align my pennies! Win-win!

Of course you can use fabric or gift wrap for this too.

Laid them out...

I initially hot-glued some, but I clumsily burned myself, and so I decided to just use
double-sided foam tape to attach them.

I'm happy with the result but my little one is much happier I think - he loves looking at them all the time now and tries to recall the places and what we did there!

I still have one more penny to add and hopefully, after our upcoming trip, this set is complete... until the next set that is!


How about you, what do you collect when you travel?
Would love to hear your thoughts! Please share away...


Hope you have a Lovely day!

Linking back to...

Monday, May 27, 2013

Re-Designing the Kitchen Office

Ok, almost ready to show you the final kitchen plan!
But before that let's look at the last section of the kitchen - the office.


Here is what the office looks now...

And here are my inspirations ...

 I like the white of course and the smaller drawers as well as having the main 'office part' in the middle.
This is similar to the first photo but take note that the cabinet goes all the way up the ceiling 
which I like too.

source

I like this because I want a display shelf similar to this for the middle cabinet.

source

This one shows the over-all feel I want for that area.
And here are the design rendering by Heather Lapham from E.A. Knight Construction.
This first design looks ok, however, we have a 27" MAC and I think the space above it might be too close to the monitor. Also I wanted the table counter height. That way, I could watch a movie or video while cooking and also supervise my son as he does his online therapies.

I also wanted a cabinet on the right for the printer instead of drawers.
After some tweaking, here is what  the final cabinet/area will look like...


The shelves in the middle will be all glass and lit up from above.
Notice too all the drawers and the printer cabinet on the right.

I know I'm a bit O-C on every little detail and Heather thankfully, is very patient with me and my continuous changes and requests.
I just want to make sure I do it right for us.
We're almost done with the design process!
If you want to see the Plans for the Kitchen Island, Click here, and for the Plans for the Pantry Cabinet, click here. And if you want to see what the entire Kitchen looks like now, CLICK HERE.

Would love to hear your thoughts! Please share away... 


Friday, May 24, 2013

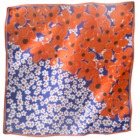
Speaking of Scarves....

Did you know that Vera Neumann's brilliant designs are
currently available at TARGET?

Vera is known for her bold use of colors and she believed that ART should surround people in all aspects of their lives! 

Here are some of my favorites...


Perfect for this Memorial Day Weekend right?! Even as pillow covers just like what Bethany did over at "Powell Brower at home"! Check it out if you have the time!


Have a Great Memorial Day!

Would love to hear your thoughts! Please share away...

Thursday, May 23, 2013

Organizing your Screws


I tried helping my husband organize some of his stuff in the garage 2 weeks ago and I told him I'll tackle the 'most difficult one'. And so, he gave me these 3 boxes of SCREWS!!!1

ALL 3 filled with nails, bolts, and screws galore

This was how he tried to organized it before - not very effective since he would
always have to open each drawer up to see whats inside for the particular
screw he needed! And when your trying to find  the right one, it could take you a long while!


After hours of grouping, eliminating (yes, I found a bunch of non-screw stuff from old magnets to gauze!). I came up with this...

much better I think...

You know exactly what's inside!

I hot-glued the type of screw on the outside so that he can easily see what's inside!
He thought it was genius and I ended up with one extra container after all the organizing!
Hopefully, this will stay the way it is for now and always!


Tuesday, May 21, 2013

Bath Decor

Like most of you, I bet your bath does not look like this...

source
or this...

source

.. Or maybe a big 'YES' for some. Definitely not mine. 

However, we all try to make the best we can, and so, one day, here's what I did with my tub...

Small oasis of respite

Used apothecary jars I have collected from TJ Maxx, filled it with bath salts, spa[ and sponges. I also added a fish-fish bowl also from TJ Maxx filled with more scrubs. I also have a JA candle to add ambience and of course my favorite foam baths and soap scrubs (one made by my son).

Call me VAIN but I love my mirror on my tub


Real sea sponge I scored at an Antique mall


Eventually moved the sponge here


A place to relax and unwind
Do you try to decorate around your tub? What is your favorite bath routine?
Would love to hear your thoughts! Please share away...


Sunday, May 19, 2013

Re-Designing the Kitchen Island

Thank you so much for all your responses on my cooktop dilemma!
I feel that I need to explain more on WHY I chose Island cooktop vs. the wall cooktop, since the wall cooktop looks pretty amazing already.

Well, some of my blogger friends know this already.
 1)One of the big factors to my choice is COST.
You see, all the wiring, duct work and all is already on the current island, and my contractor explained to me more why moving the cooktop will be costly. I have a HUGE kitchen, actually, the contractor said, mine would be the biggest kitchen he'll be doing so far.
The cost is already bordering on my budget limit and I bet, it will still go up further since we haven't priced the cabinets yet. And so, we are keeping the cooktop where it is, on the island.

2) Also, there is  a gorgeous view across the island - not just the office area  but since it will be facing diag diagonally, it will be facing the pool area and back porch! It will be so nice especially in the summer.

3) And probably the most important reason for me is my need to supervise my son while I cook.
My little one also does daily online therapies. For those of you not familiar with online therapies, these are computer-internet based learning and language therapies for kids with learning disabilities.
My son needs to do 3-4 therapy session every afternoon after school on top of his homework. This needs my supervision and also because, he wants me to watch as he does this. I think it's a simple request from a kid who's already doing so much. If I do the therapies with him, this would eat out almost 2 hours of my time - after work, that means no cooking, no dinner or dinner out, a lot.

My friend CAROL from "Oasis in the Desert" and Robin From "Happily Home After" explained to me that in reality you don't really spend much time on facing the cooktop itself - and that is true, for most people. For me though, I will. So my prep work and cooking needs to be on the island.


Ok, enough said, here is what our current Kitchen Island looks like again...


It is situated across the office and will be so again when we renovate with one major difference - it will not have the gigantic space gap from the counter top behind!


Here are my Inspirations...


homebunch.com

I love the contrasting cabinetry - white on the background cabinets and dark wood on the island.

source

I want the bar height (42") for the eat-in area of the island, that way I could avoid splatter and spills running down my 'customers' ;-)

source

Of course, my inspiration wouldn't be complete without Christopher Peacock's design as an inspiration!

mydesignchic.com
I love the beverage fridge here and the drawers on the side. Easy access for plates and the like for our breakfast area.

And here are the design renderings of Design Coordinator, Heather Lapham of E.A. Knight Construction.


First draft was a flat island. Again, for safety reasons, I wanted a two-step island. Although flat straight islands are gorgeous, and originally, this was what I really wanted. But for my family, I just don't think this type would work. Plus I also did not like that line of cabinets underneath.

Here is the 2nd draft...


In the 2nd draft, the only complaint I had was the very deep eat-in tabletop - 30" was too deep and I was afraid that the island would be TOO BIG. 
I love that Heather kept the beverage fridge  at counter height too.


I asked for the drawers for pots and pand underneath the cooktop and 2 spice racks on each side. 
I think this is prettier and more practical too.


When my husband saw the design, he suggested though why not make the eat-in tabletop just go all the way to the edge? He thought it was nicer to look at. One big caveat though, I would loose my beverage fridge area or sacrifice a cabinet for a space for the fridge. 
Here's what it will look like if ever...


Much smaller island work area

Looks nice over-all but I decided not to sacrifice the extra-storage and fridge.

We went back to the original 2nd draft design with the eat-in island tabletop  only 20" deep.
Here's what it will look like.


What do you think? How does the island work in your home?
Would love to hear your thoughts! Please share away...

Have a Beautiful Day! 

Linking back to these fabulous parties...